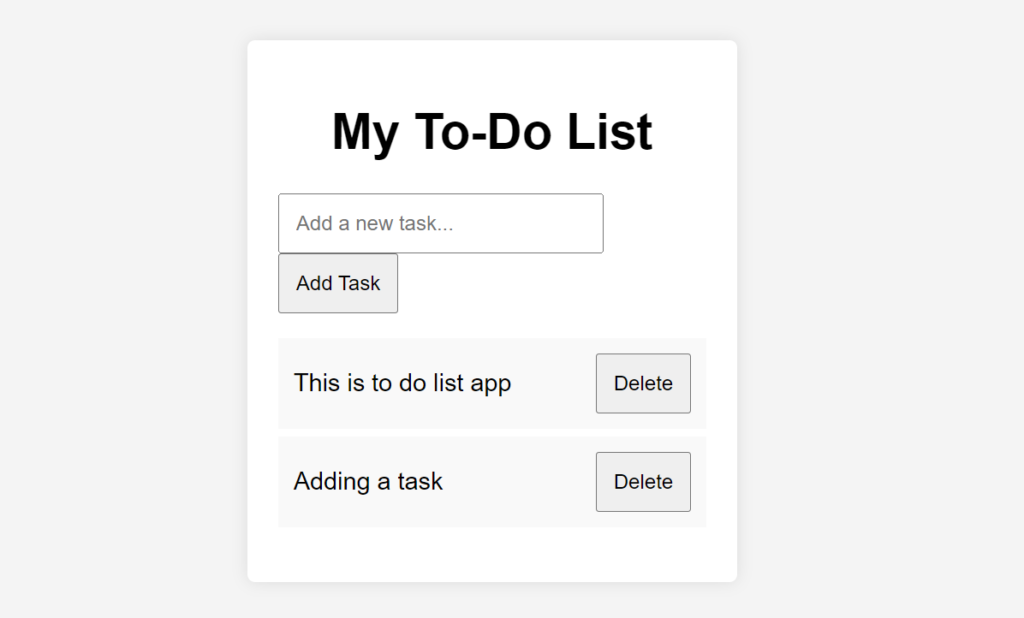
Creating a To-Do List app is a great way to practice your web development skills. In this blog post, we’ll walk you through building a simple To-Do List application using HTML, CSS, and JavaScript. This app will allow users to add, remove, and mark tasks as complete.
What You’ll Learn
- How to structure your app using HTML.
- How to style your app using CSS.
- How to add interactivity with JavaScript.
Prerequisites
You should have a basic understanding of HTML, CSS, and JavaScript. No prior experience is necessary!
Step 1: Setting Up the HTML Structure
First, create an index.html file. This will serve as the foundation of our app.
htmlCopy code<!DOCTYPE html>
<html lang="en">
<head>
    <meta charset="UTF-8">
    <meta name="viewport" content="width=device-width, initial-scale=1.0">
    <title>To-Do List App</title>
    <link rel="stylesheet" href="styles.css">
</head>
<body>
    <div class="container">
        <h1>My To-Do List</h1>
        <input type="text" id="taskInput" placeholder="Add a new task...">
        <button id="addTaskButton">Add Task</button>
        <ul id="taskList"></ul>
    </div>
    <script src="script.js"></script>
</body>
</html>
Explanation:
- The
inputfield allows users to enter new tasks. - The
buttontriggers the addition of the task to the list. - The
ulelement will display the list of tasks.
Step 2: Styling with CSS
Next, create a styles.css file to style your app.
cssCopy codebody {
    font-family: Arial, sans-serif;
    background-color: #f4f4f4;
    display: flex;
    justify-content: center;
    align-items: center;
    height: 100vh;
    margin: 0;
}

.container {
    background: white;
    padding: 20px;
    border-radius: 5px;
    box-shadow: 0 0 10px rgba(0, 0, 0, 0.1);
}

h1 {
    text-align: center;
}

input {
    width: calc(100% - 90px);
    padding: 10px;
    margin-right: 10px;
}

button {
    padding: 10px;
}

ul {
    list-style-type: none;
    padding: 0;
}

li {
    padding: 10px;
    margin: 5px 0;
    background: #f9f9f9;
    display: flex;
    justify-content: space-between;
    align-items: center;
}

li.completed {
    text-decoration: line-through;
    color: grey;
}
Explanation:
- The CSS styles the app for a clean, modern look.
- We added styles for the list items to differentiate completed tasks.
Step 3: Adding Functionality with JavaScript
Now, create a script.js file to make the app interactive.
javascriptCopy codedocument.getElementById('addTaskButton').addEventListener('click', function() {
    const taskInput = document.getElementById('taskInput');
    const taskText = taskInput.value.trim();

    if (taskText === "") {
        alert("Please enter a task.");
        return;
    }

    const li = document.createElement('li');
    li.textContent = taskText;

    li.addEventListener('click', function() {
        li.classList.toggle('completed');
    });

    const deleteButton = document.createElement('button');
    deleteButton.textContent = 'Delete';
    deleteButton.addEventListener('click', function() {
        li.remove();
    });

    li.appendChild(deleteButton);
    document.getElementById('taskList').appendChild(li);
    taskInput.value = '';
});
Explanation:
- We listen for a click event on the “Add Task” button.
- When clicked, it checks if the input is empty and alerts the user if it is.
- It creates a new list item with the task text, and adds a “Delete” button.
- Clicking on the task toggles its completion state.