Introduction
SVG (Scalable Vector Graphics) is a powerful tool for creating interactive and visually appealing web graphics. In this blog post, we’ll explore how to create a dynamic SVG mask effect using JavaScript. This effect will allow an image to reveal its underlying content as the mouse cursor moves across it. We’ll break down the code step by step and explain how it works, making it easy for you to implement this effect on your own website.
What You Will Learn
- How to create an SVG element with images.
- How to use the
<clipPath>element for masking. - How to implement mouse tracking with JavaScript.
Step 1: Setting Up the HTML Structure
Below is the HTML code that sets up our SVG and JavaScript functionality:
htmlCopy code<!DOCTYPE html>
<html lang="en">
<head>
    <meta charset="UTF-8">
    <meta name="viewport" content="width=device-width, initial-scale=1.0">
    <title>Dynamic SVG Mask Effect</title>
</head>
<body>
    <svg width="250" height="650">
        <image xlink:href="human.jpg" width="250" height="600"/>
        <clipPath id="XrayMask">
            <circle id="maskCircle" cx="50%" cy="50%" r="10%"/>
        </clipPath>
        <image clip-path="url(#XrayMask)"
        xlink:href="skeleton.jpg" width="250" height="600"/>
    </svg>

    <script>
        let animate = document.getElementById("maskCircle");
        window.addEventListener('mousemove', function(e) {
            animate.setAttribute("cx", e.pageX);
            animate.setAttribute("cy", e.pageY);
        }, false);
    </script>
</body>
</html>
Understanding the SVG Element
SVG Structure
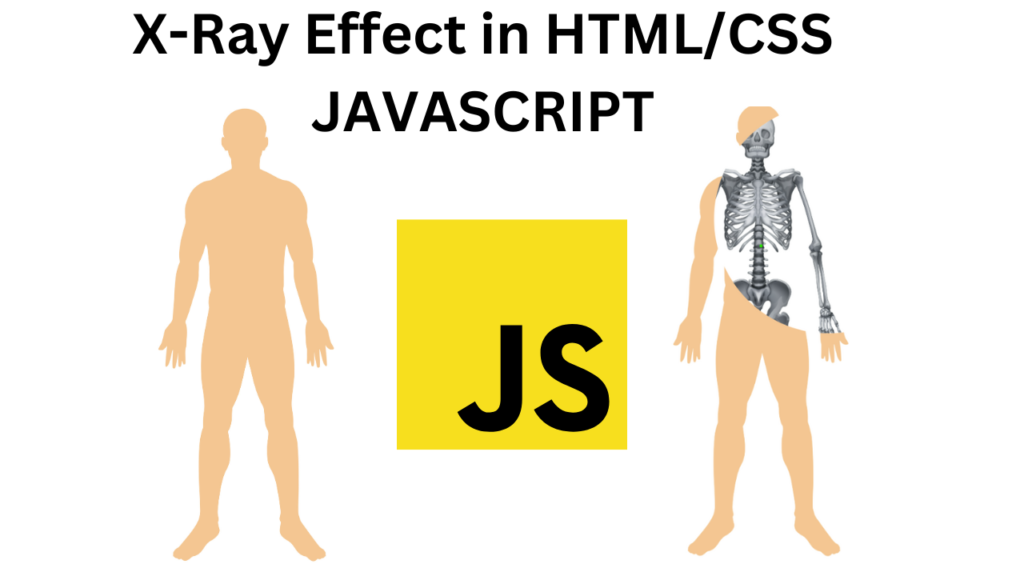
The SVG element serves as a container for vector graphics. In our example, we have two images stacked on top of each other:
- The first
<image>element displays an image named “human.jpg”, with dimensions of 250 pixels wide and 600 pixels tall. - We define a
<clipPath>element with the ID “XrayMask”, which will act as the mask for our effect. - Inside the
<clipPath>, we place a<circle>element with the ID “maskCircle”. This circle will move to create the masking effect. - The second
<image>element displays “skeleton.jpg”, which is masked by the previously defined<clipPath>.
The JavaScript Functionality
In the JavaScript section, we achieve the dynamic effect:
- We select the “maskCircle” element using
document.getElementById("maskCircle")and store it in the variable animate. - We add a mousemove event listener to the window. This listener triggers a function whenever the mouse moves.
- Inside the function, we update the position of the “maskCircle” element using
animate.setAttribute("cx", e.pageX)andanimate.setAttribute("cy", e.pageY). This creates the dynamic masking effect as the cursor moves.