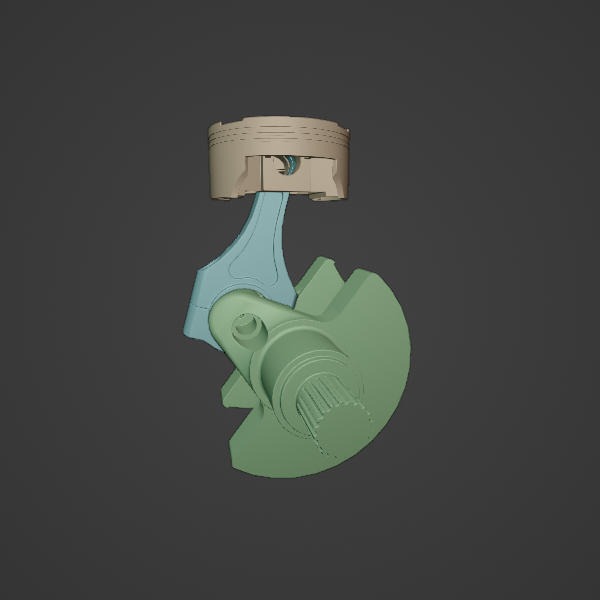
Title: Rigging a Single-Piston Crank Engine Mechanism in Blender
Introduction:
In this blog, we will explore the fascinating world of mechanical rigging in Blender and create a realistic animation of a single-piston crank engine mechanism. Blender is a powerful open-source 3D modeling and animation software, and rigging enables us to add movement and interactivity to our 3D models. We will walk through the step-by-step process of creating a functional crank engine animation and understand the key concepts involved in rigging.
- Understanding the Single-Piston Crank Engine Mechanism:
Before we dive into rigging, let’s grasp the basic principles of a single-piston crank engine mechanism. We will explore the components involved, such as the piston, connecting rod, and crankshaft, and how they work together to convert linear motion into rotational motion. - Preparing the 3D Model:
To begin, we need a 3D model of the single-piston crank engine. We will discuss techniques for modeling each component accurately and ensuring that they are aligned correctly to create a seamless animation. - Introduction to Rigging in Blender:
In this section, we will introduce the rigging tools available in Blender, such as bones, constraints, and drivers. We will explain their functionalities and how they play a crucial role in animating the crank engine mechanism. - Building the Rig:
We will start rigging the piston, connecting rod, and crankshaft. We’ll create a hierarchical structure using bones, setting up parent-child relationships to mimic the real-world mechanics of the engine. - Applying Constraints and Drivers:
To enable realistic motion, we’ll implement constraints and drivers on various components. We’ll explore how to set up rotational constraints and drive the movement of the piston and connecting rod based on the position of the crankshaft. - Animating the Crank Engine Mechanism:
With the rig in place, we’ll animate the single-piston crank engine. We’ll visualize the different stages of the four-stroke engine cycle (intake, compression, power, and exhaust) and create a smooth and accurate animation. - Fine-Tuning the Animation:
We’ll polish the animation, adjusting keyframes and easing functions to ensure fluid motion. Additionally, we’ll explore techniques to control the engine’s speed and rotation manually. - Adding Realism with Materials and Textures:
To enhance the visual appeal, we’ll apply materials and textures to our model. We’ll cover how to create realistic metal surfaces and add visual effects such as heat and motion blur. - Rendering the Animation:
With the animation complete, we’ll set up the rendering parameters in Blender to generate high-quality output. We’ll discuss rendering settings, frame rates, and file formats for the best results.
Conclusion:
Rigging a single-piston crank engine mechanism in Blender is a fascinating process that combines engineering principles with creative animation techniques. By understanding the rigging tools and concepts, we can create captivating animations of complex mechanical systems. With the knowledge gained from this blog, you can explore and experiment with other mechanical rigging projects, elevating your 3D animation skills to new heights.
In the end, the ability to bring mechanical systems to life through animation opens up endless possibilities for educational videos, product demonstrations, and visual storytelling. So, let’s embark on this exciting journey of rigging and animation in Blender!

Sir I want this model for practice. thanks